How to batch upload your flightplans: Difference between revisions
No edit summary |
|||
| Line 7: | Line 7: | ||
== | == Build your text file ready for upload == | ||
[[Image:Tutorial-batchupload-1.jpg]] | [[Image:Tutorial-batchupload-1.jpg]] | ||
| Line 30: | Line 30: | ||
Make sure at the end of your text file there are no extra 'invisible' lines created by a 'line feed', your cursor should 'blinking' be at the end of the last entry on the last line and using the forward arrow on your keyboard should have no effect.. | Make sure at the end of your text file there are no extra 'invisible' lines created by a 'line feed', your cursor should 'blinking' be at the end of the last entry on the last line and using the forward arrow on your keyboard should have no effect.. | ||
== | == Go to 'Flightplans' page == | ||
Select >> Import/Export flightplan | Select >> Import/Export flightplan | ||
| Line 36: | Line 36: | ||
[[Image:Tutorial-batchupload-2.jpg]] | [[Image:Tutorial-batchupload-2.jpg]] | ||
== | == Import/Exprt Flightplan option == | ||
Select Import flightplan from : TXT file | Select Import flightplan from : TXT file | ||
| Line 43: | Line 43: | ||
== | == Import Flightplan selection type == | ||
By default the 'Add to FP' button is selected and this will KEEP your existing flighplans and ADD them the flights you are about to upload. If you were to select 'Replace FP' this function will DELETE all existing flightplans and REPLACE them with the file you are uploading. | By default the 'Add to FP' button is selected and this will KEEP your existing flighplans and ADD them the flights you are about to upload. If you were to select 'Replace FP' this function will DELETE all existing flightplans and REPLACE them with the file you are uploading. | ||
| Line 49: | Line 49: | ||
[[Image:Tutorial-batchupload-4.jpg]] | [[Image:Tutorial-batchupload-4.jpg]] | ||
== | == Browse to your upload file == | ||
[[Image:Tutorial-batchupload-5.jpg]] | [[Image:Tutorial-batchupload-5.jpg]] | ||
== | == Select the file for upload == | ||
[[Image:Tutorial-batchupload-6.jpg]] | [[Image:Tutorial-batchupload-6.jpg]] | ||
== | == Confirm filepath is correct == | ||
[[Image:Tutorial-batchupload-7.jpg]] | [[Image:Tutorial-batchupload-7.jpg]] | ||
== | == Hit the 'Upload' button == | ||
[[Image:Tutorial-batchupload-8.jpg]] | [[Image:Tutorial-batchupload-8.jpg]] | ||
== | == Update confirms == | ||
At this point, if there were any errors in your file then they would be reported here with the line number/s concerned. Only those flightplans that are correct and without errors will be uploaded. Make a note of which lines that are in error and try and fix them. If there are just a few lines from a large upload that are at fault it may be simpler to rebuild those that are at fault. Repeat the process to upload those lines that failed in the initial upload and better luck second time around. | At this point, if there were any errors in your file then they would be reported here with the line number/s concerned. Only those flightplans that are correct and without errors will be uploaded. Make a note of which lines that are in error and try and fix them. If there are just a few lines from a large upload that are at fault it may be simpler to rebuild those that are at fault. Repeat the process to upload those lines that failed in the initial upload and better luck second time around. | ||
| Line 71: | Line 71: | ||
[[Image:Tutorial-batchupload-9.jpg]] | [[Image:Tutorial-batchupload-9.jpg]] | ||
== | == Check the results == | ||
Check the results on your Flightplan page. You can see the effect the variations had on the actual entries on the flightplan page. The training flight (1) is correctly displayed. The flight (2)where I'd left the days of operation blank is correctly displayed as a daily flight. The flights (3 and 4) where I'd varied the days of operation show the correct days. | Check the results on your Flightplan page. You can see the effect the variations had on the actual entries on the flightplan page. The training flight (1) is correctly displayed. The flight (2)where I'd left the days of operation blank is correctly displayed as a daily flight. The flights (3 and 4) where I'd varied the days of operation show the correct days. | ||
Revision as of 09:58, 30 August 2009
Hi,
Here's a quick "How to batch upload your flightplans" so that you don't come unstuck.
Please note, since I made this tutorial there has been a slight change to the format so PLEASE read the edit of 14th November which you will find at the end.
Build your text file ready for upload
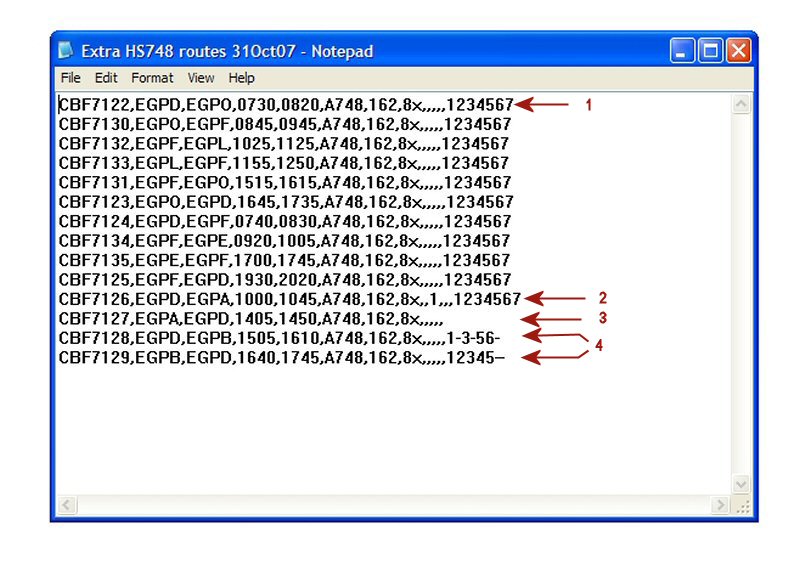
What does this lot mean? From left to right we have different 'fields' which insert values into the FlyNET database :
Flt No, Depart ICAO, Arrival ICAO, STD, STA, A/C ICAO, FlyNET A/C TYPE ID,Aircraft Registration, Sim Rate, Price, Flight Type, Route, Remarks, Days of operation
Each is seperated by a comma and there is no comma at the start each line. All fields from 'Flt No.' to 'FlyNET A/C TYPE ID' must be given an entry. For 'Sim Rate', 'Price', Flight type', 'Route', 'Remarks' and 'Days of Operation' you may leave these blank in which case certain default values will be assumed. If these fields are left blank, the commas are still there to seperate the values (blank in this case) which enables the database script to interpret the fields correctly.
Defaults values if no entry made:
Aircraft registration = selectable for any aircraft Sim Rate = 1x Price = Standard Ticket price Flight Type = Scheduled Route = Entry left blank Remarks = Entry left blank Days of operation = 1234567
As examples, I have made one flight (2) a training flight, on one flight (3) I left the days of operation blank and on two flights (4) I changed the days of operation. Note on days of operation you must make seven entries giving the number of the day which the flights operate and a 'dash' for the days that are not operated as per the examples. If you only wanted a flight on a monday then the entry would be 1------ Make sure at the end of your text file there are no extra 'invisible' lines created by a 'line feed', your cursor should 'blinking' be at the end of the last entry on the last line and using the forward arrow on your keyboard should have no effect..
Go to 'Flightplans' page
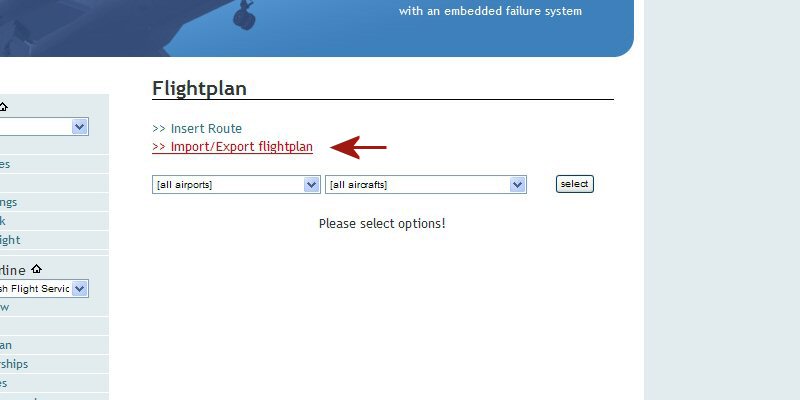
Select >> Import/Export flightplan
Import/Exprt Flightplan option
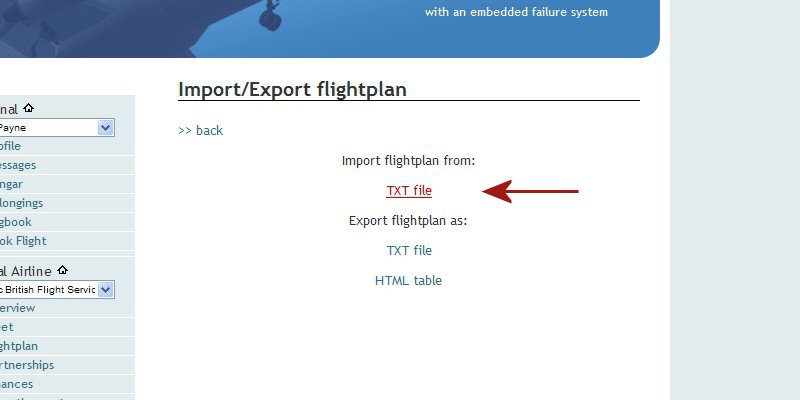
Select Import flightplan from : TXT file
Import Flightplan selection type
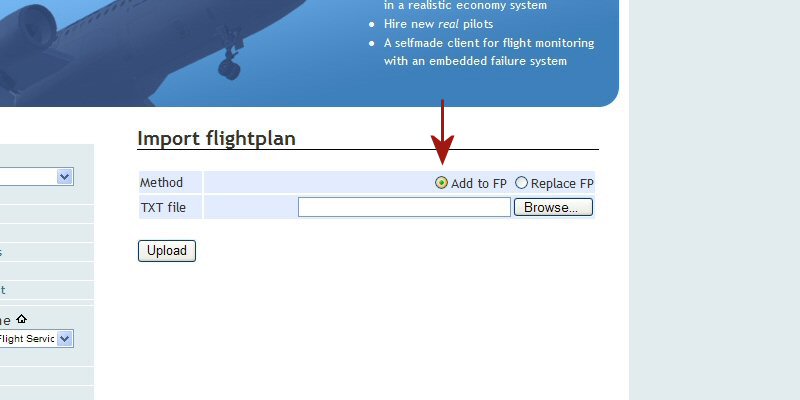
By default the 'Add to FP' button is selected and this will KEEP your existing flighplans and ADD them the flights you are about to upload. If you were to select 'Replace FP' this function will DELETE all existing flightplans and REPLACE them with the file you are uploading.
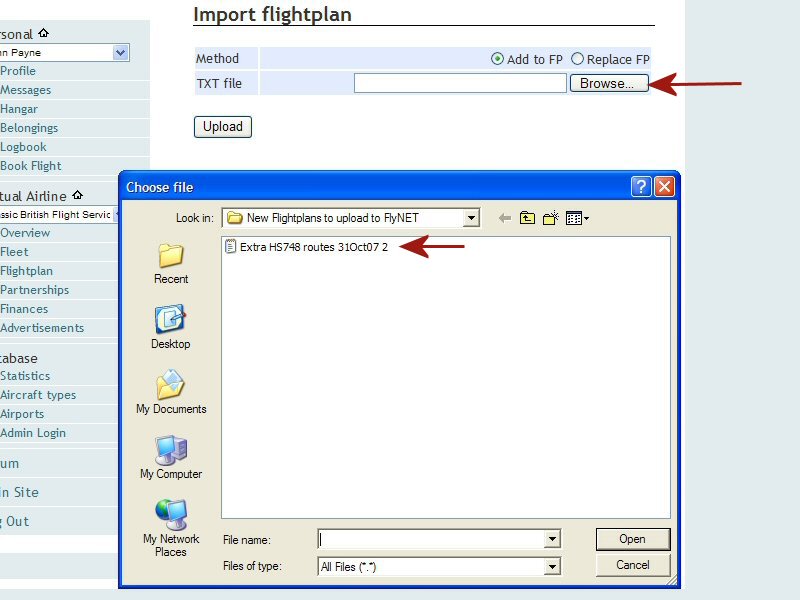
Browse to your upload file
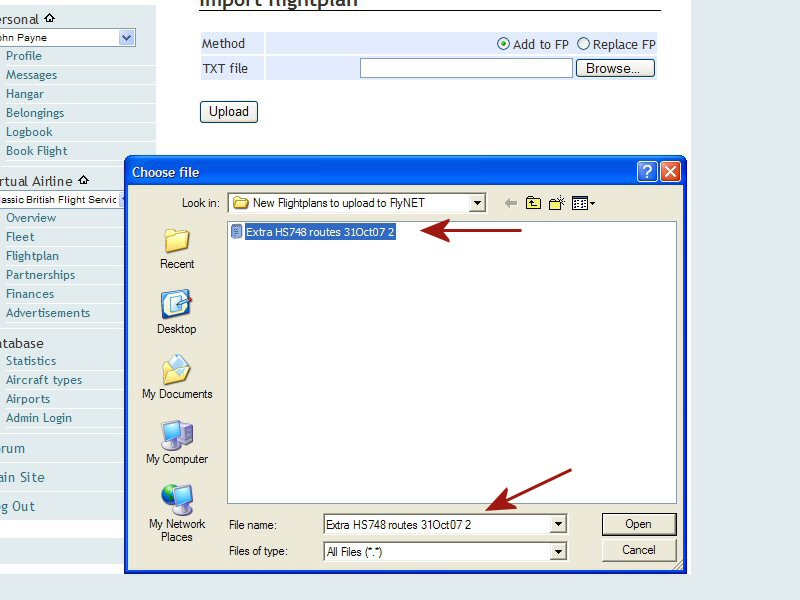
Select the file for upload
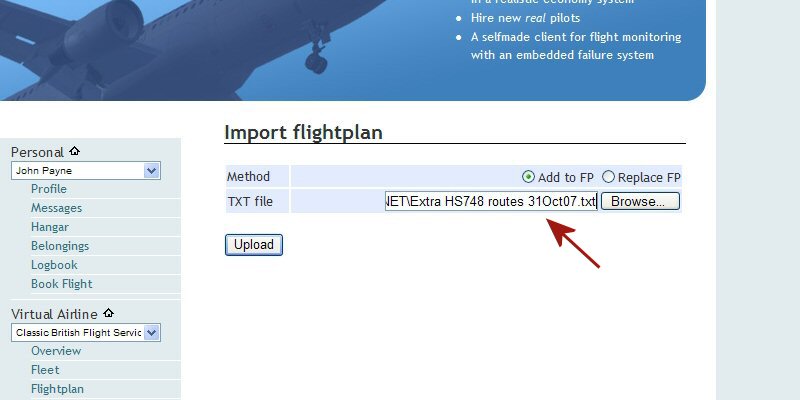
Confirm filepath is correct
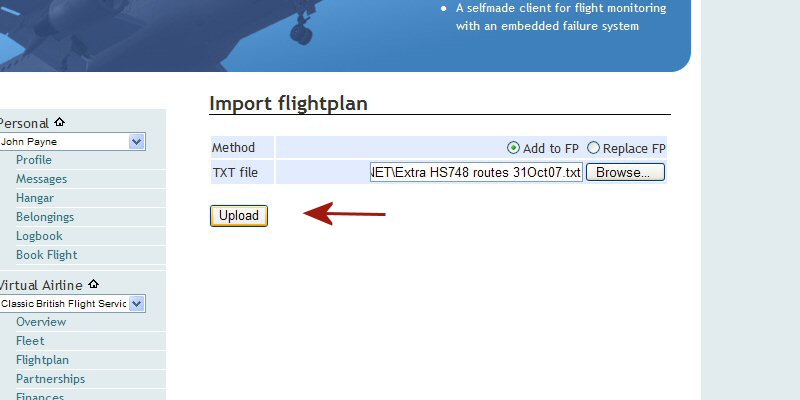
Hit the 'Upload' button
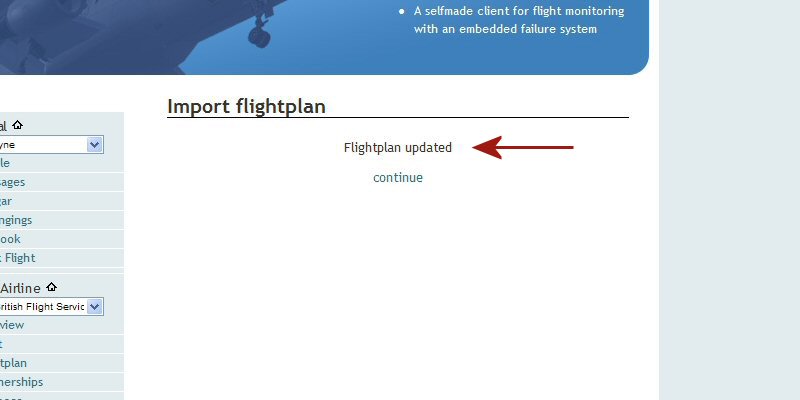
Update confirms
At this point, if there were any errors in your file then they would be reported here with the line number/s concerned. Only those flightplans that are correct and without errors will be uploaded. Make a note of which lines that are in error and try and fix them. If there are just a few lines from a large upload that are at fault it may be simpler to rebuild those that are at fault. Repeat the process to upload those lines that failed in the initial upload and better luck second time around.
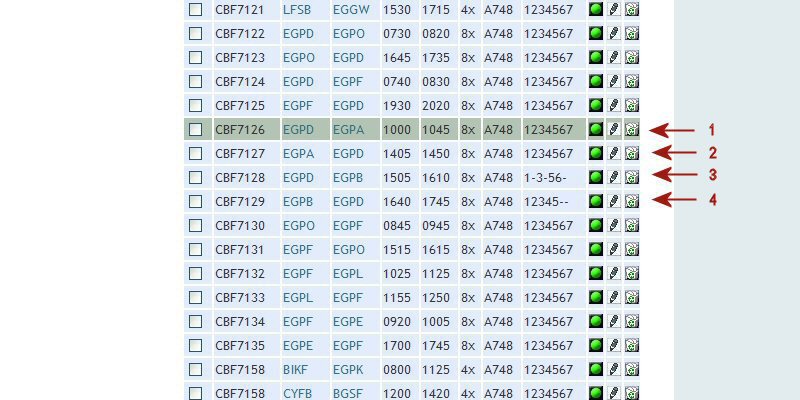
Check the results
Check the results on your Flightplan page. You can see the effect the variations had on the actual entries on the flightplan page. The training flight (1) is correctly displayed. The flight (2)where I'd left the days of operation blank is correctly displayed as a daily flight. The flights (3 and 4) where I'd varied the days of operation show the correct days.
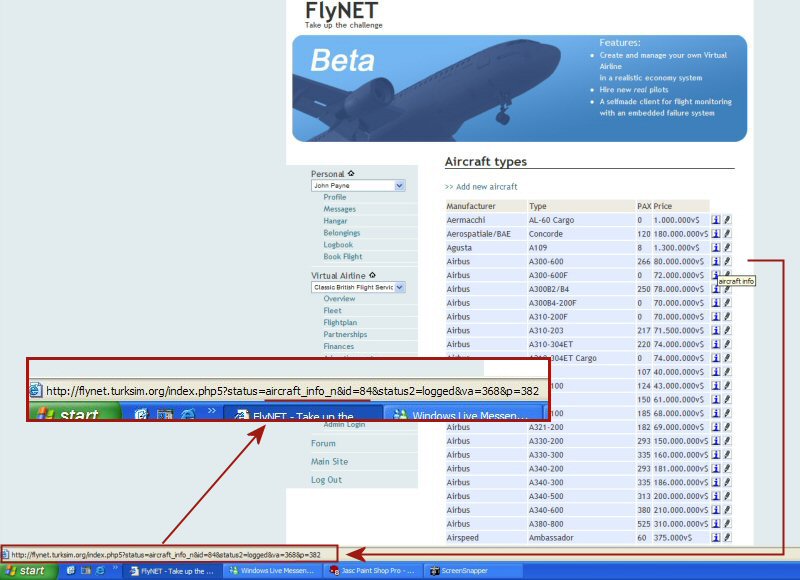
Where can I find the A/C Type ID Codes?
The screenshot below doesn't show the mouse cursor but it is actually hovering over the 'info' button for the Airbus A300-600. A url has popped up on the address bar below which I have 'magnified'. You can see the url which gives the aircraft ID number within it, which in this case is ID=84. It's just a quick and simple job to run your mouse over the info buttons of all your aircraft types that you need and then make a record of them somewhere.
EDIT : 14th November 2007
You can now lock a particular flightplan to a specific aircraft by registration if desired. Insert registration after aircraft type ID.
e.g. Flightplan locked to a/c reg G-ASPL
CBF7122,EGPD,EGPO,0730,0820,A748,162,G-ASPL,8x,,,,,1234567
e.g. Any A748 aircraft.
CBF7122,EGPD,EGPO,0730,0820,A748,162,,8x,,,,,1234567
+++++++++++++++++++++++++++++++++++++++++++++++++++++++
This is a fantastic tool that Konny has given us and if you build your upload file carefully and correctly it will save you a huge amount of time.
Regards
John
